

This tutorial will show you how to customize your Workflow Settings in HighLevel.
- Navigate to the Settings tab within the Workflow Builder.
- Here you’ll see a list of customizable settings.
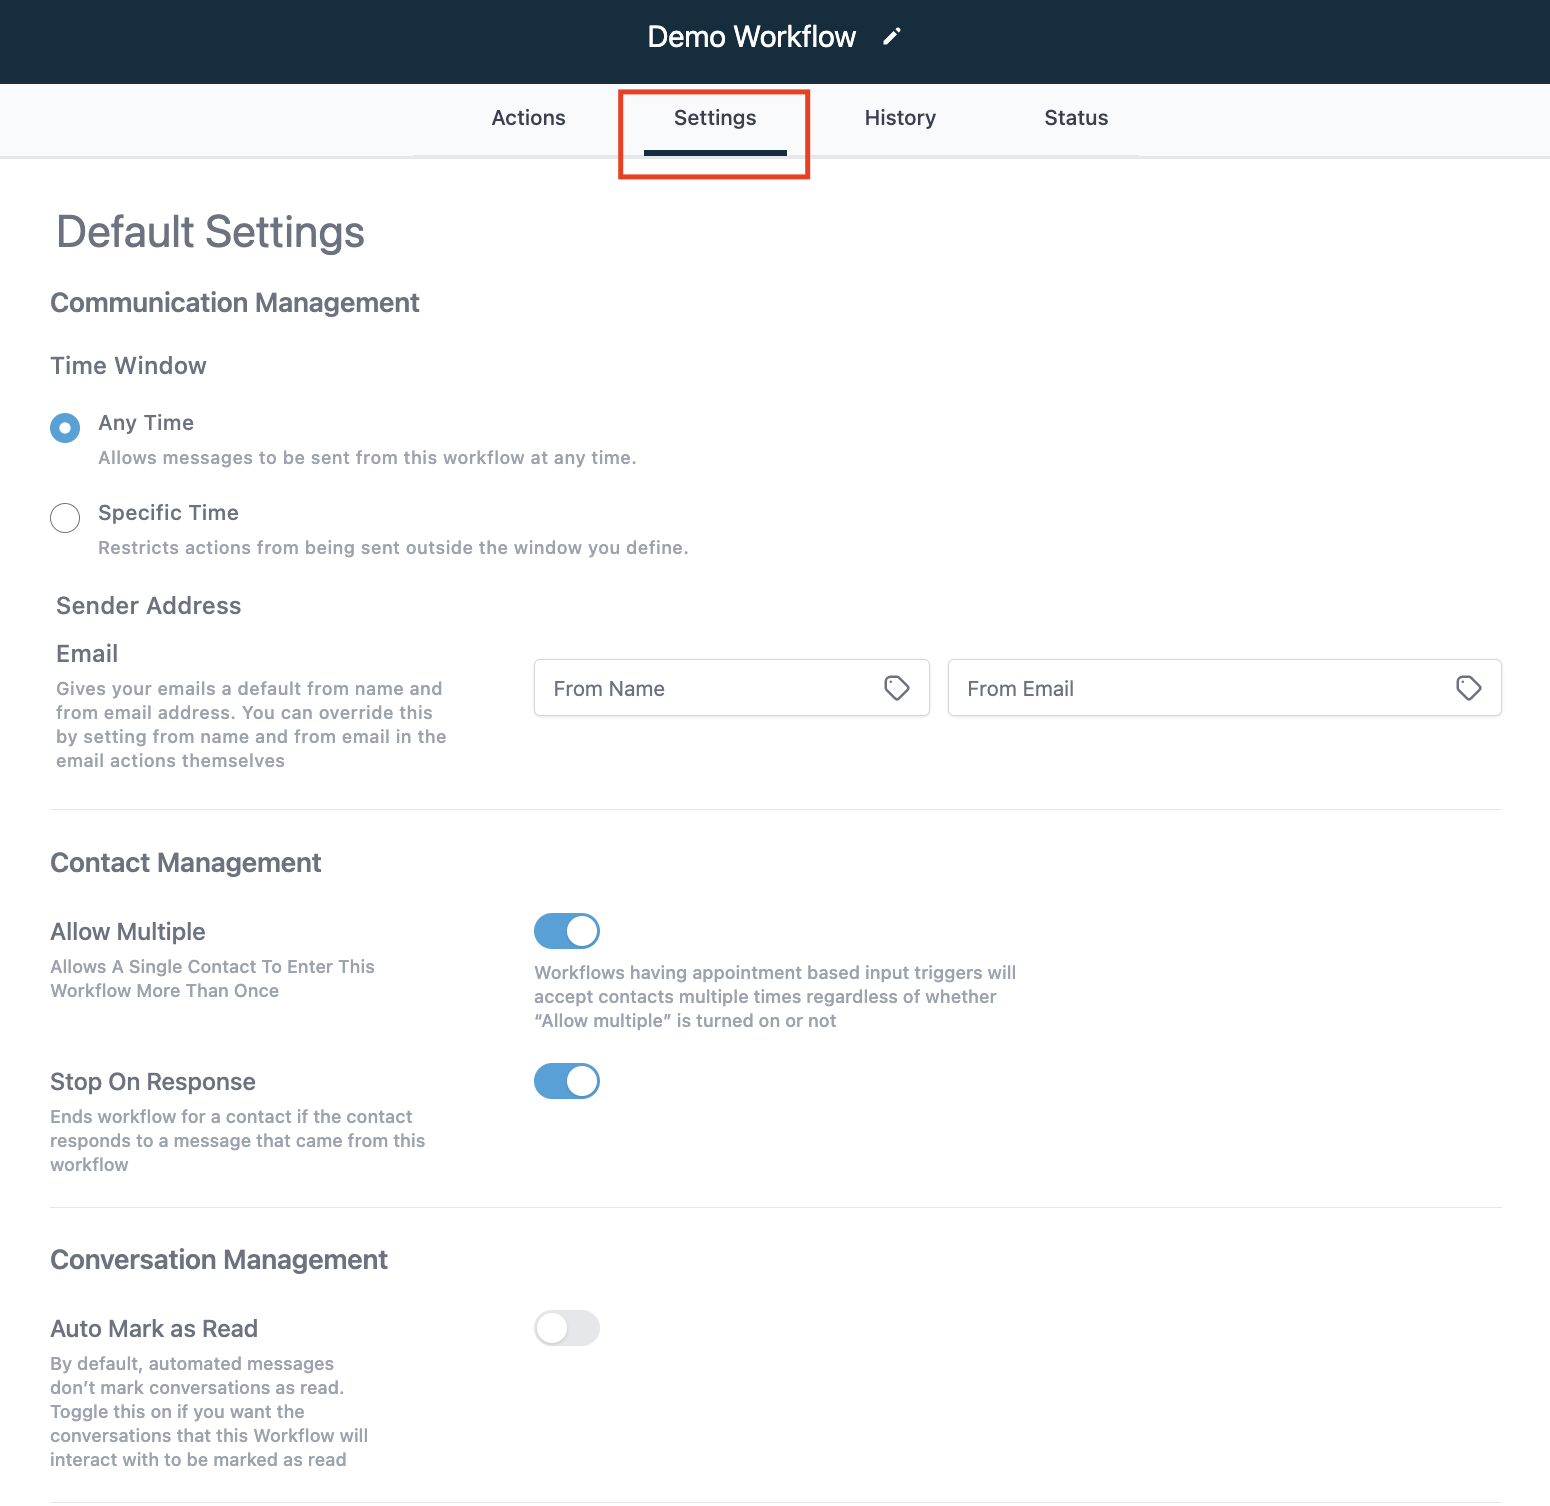
- Choose a sending window.
- If you select Any Time, the workflow will occur anytime someone is added.
- If you select Specific Times, you can customize days and times.
- Sender Address allows you to choose a specific “From” name and email.
- Allow Multiple can be toggled off or on.
- If on, the same contact can enter the same workflow multiple times.
- Stop on Response can be toggled off or on.
- If on, a specific response can trigger the workflow end. For example, if you’re using a lead nurture workflow and someone books an appointment, you wouldn’t want to keep sending them communications to book an appointment.
- Auto Mark as Read can be toggled off or on.
- If on, conversations will show up in the ALL tab, as read, vs. being Unread.
Frequently Asked Questions
Where can I change workflow settings in HighLevel?
Open the Workflow Builder and select the Settings tab to see the available settings.
How does the workflow sending window work?
Choose Any Time to allow workflow activity whenever a contact is added, or Specific Times to configure particular days and times.
What does Allow Multiple do in a HighLevel workflow?
When Allow Multiple is enabled, the same contact can enter the same workflow multiple times.
Start Your HighLevel Free Trial
Browse all GoHighLevel guides · HighLevel Workflows.